Buy Boards & Parts:
www.beezar.com
www.beezar.com
The Starving Student Millett Hybrid PCB
Construction - PCB, Part 1
|
OK, so the intent was not to show you that the focus of building the SSMH PCB was the tube LEDs - it's not. So, for the next bit of Step-by-Step, we'll focus on the PCB -
|
|
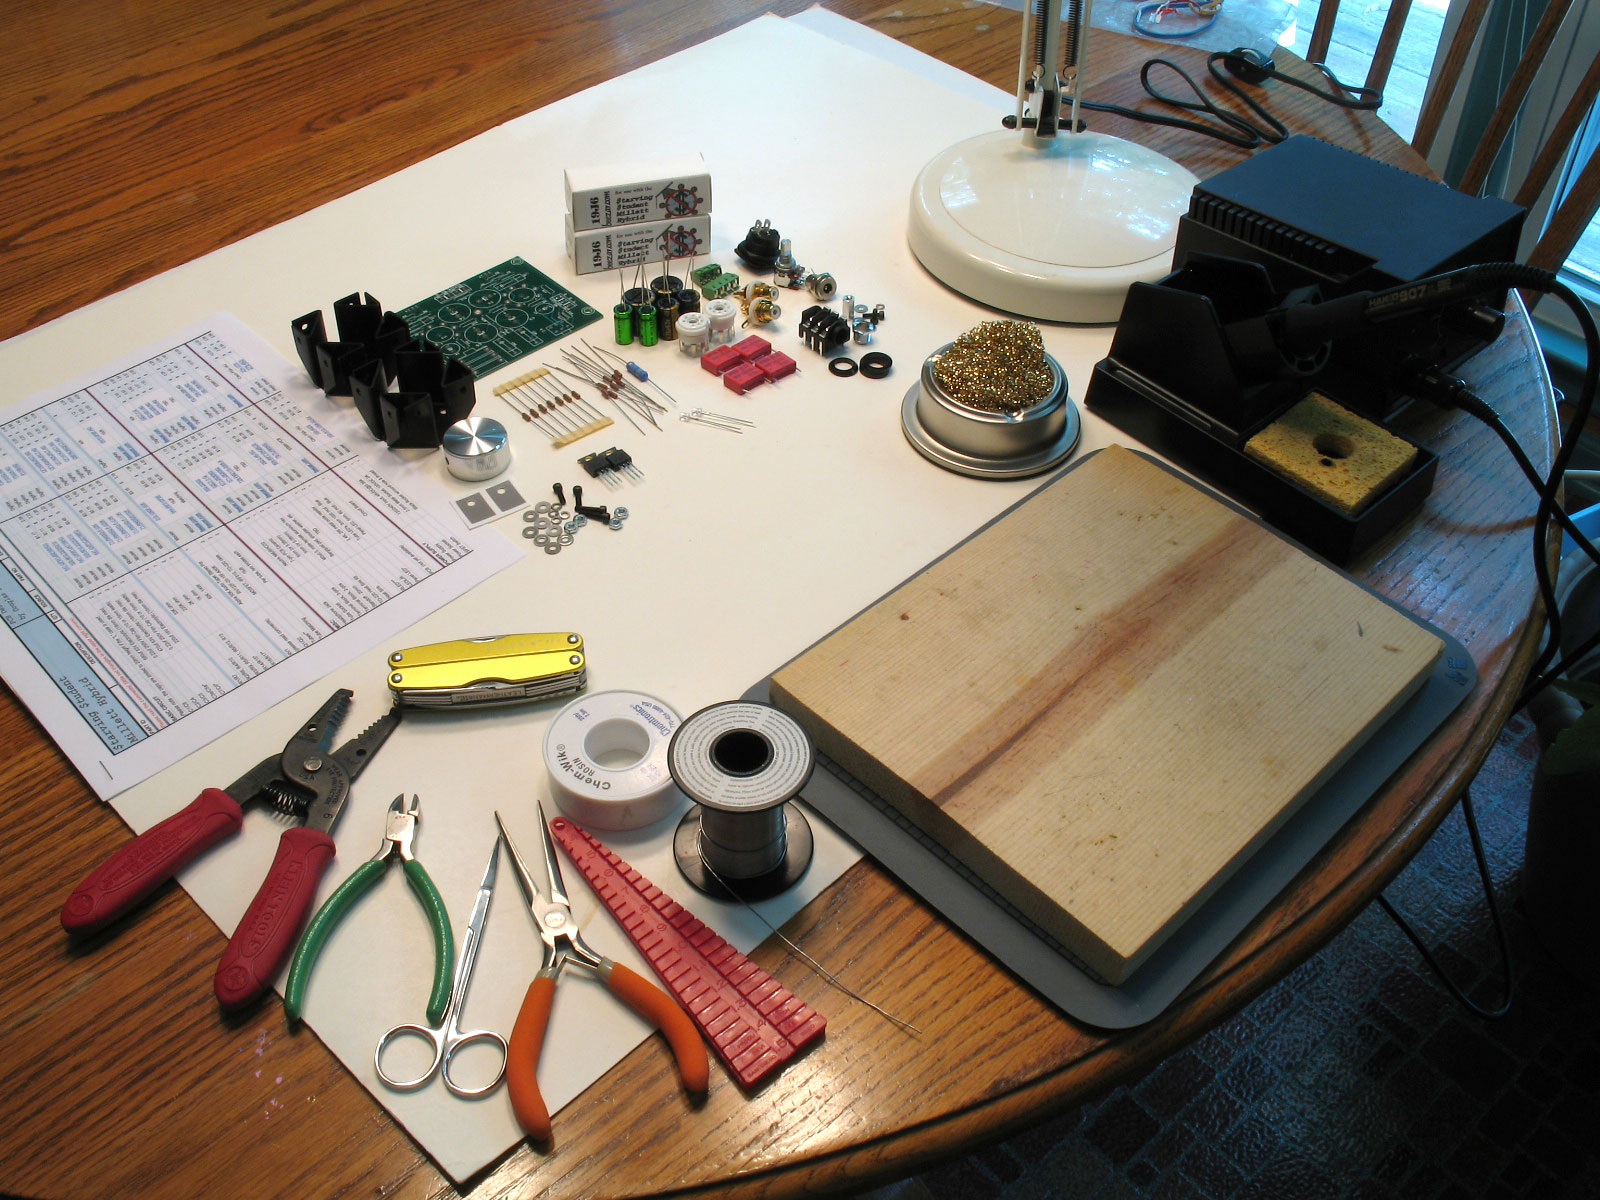 |
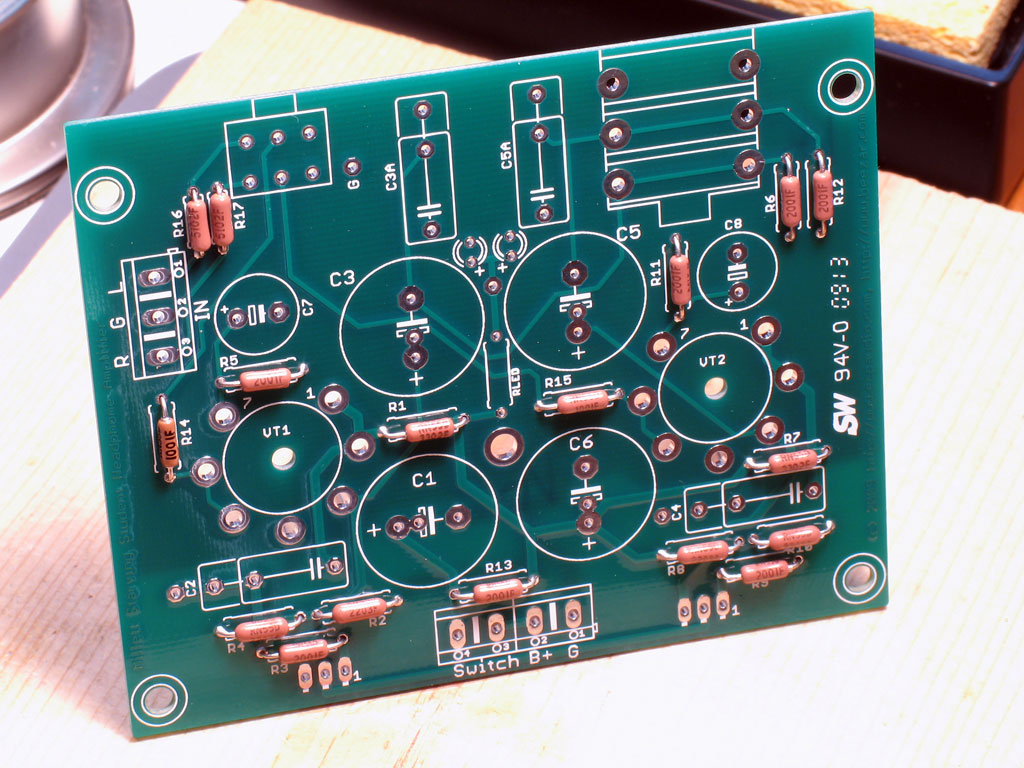
1. Gather Your Tools and Organize Your Workspace - Here's my stuff: A board to build the PCB on (1 x 10 high-finish pine), soldering iron, brass wool, light, solder, de-soldering braid, smooth-jaw needle-nose pliers, flush cutters, detail scissors, wire strippers, and a Leatherman to catch everything that the previous tools don't. Also note the bending jig - these are very cheap, only a couple of dollars when I bought one - but very valuable in bending the leads on resistors for varying size pads. Also note the BOM. You can essentially build the entire SSMH PCB with only the PCB and the BOM as reference: match the part numbers on the PCB with the part numbers on the BOM - that's it! |
 |
2. Install the Resistors on the PCB - When you populate a PCB, you want to start with the lowest-height parts first, then progress in ever-increasing height to the last parts. You do this because using the wooden board, you're able to turn the board over and mash down with your free hand while holding the soldering iron tip to a solder joint to keep it melted. Remove the soldering iron, let cool - all the while mashing down - and every part will go down flat against the board. Anyway, it's a safe bet the V-D resistors are the smallest things on the board, so we'll do those first. Here are a few I've pulled out to determine resistance values. |
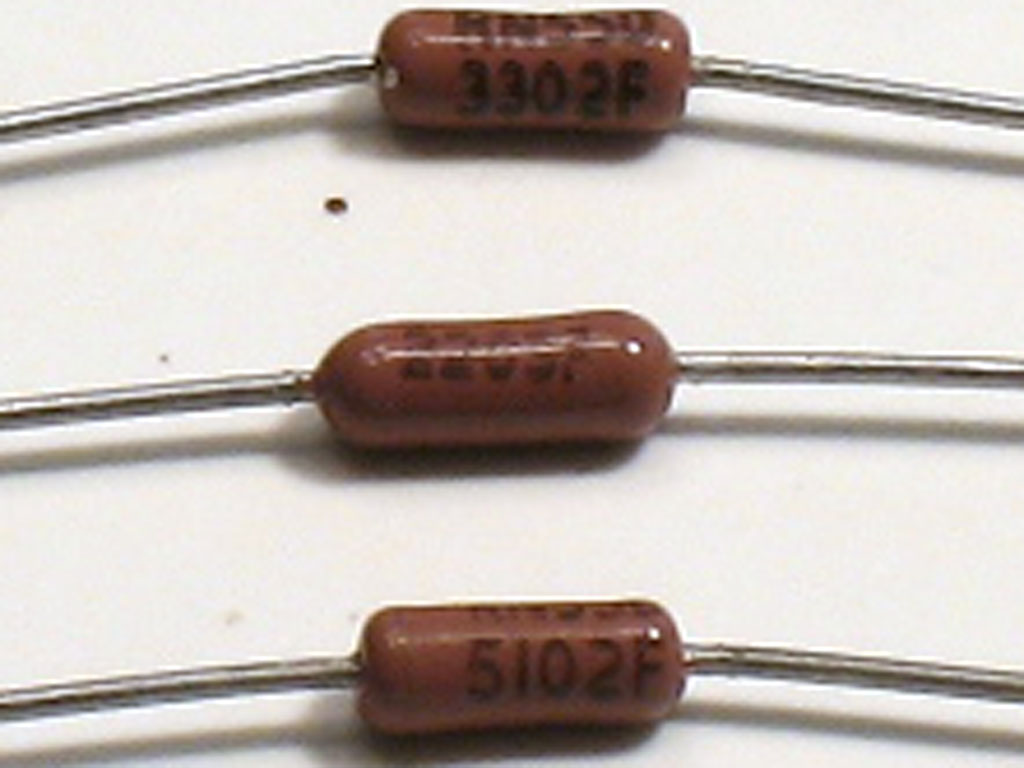 |
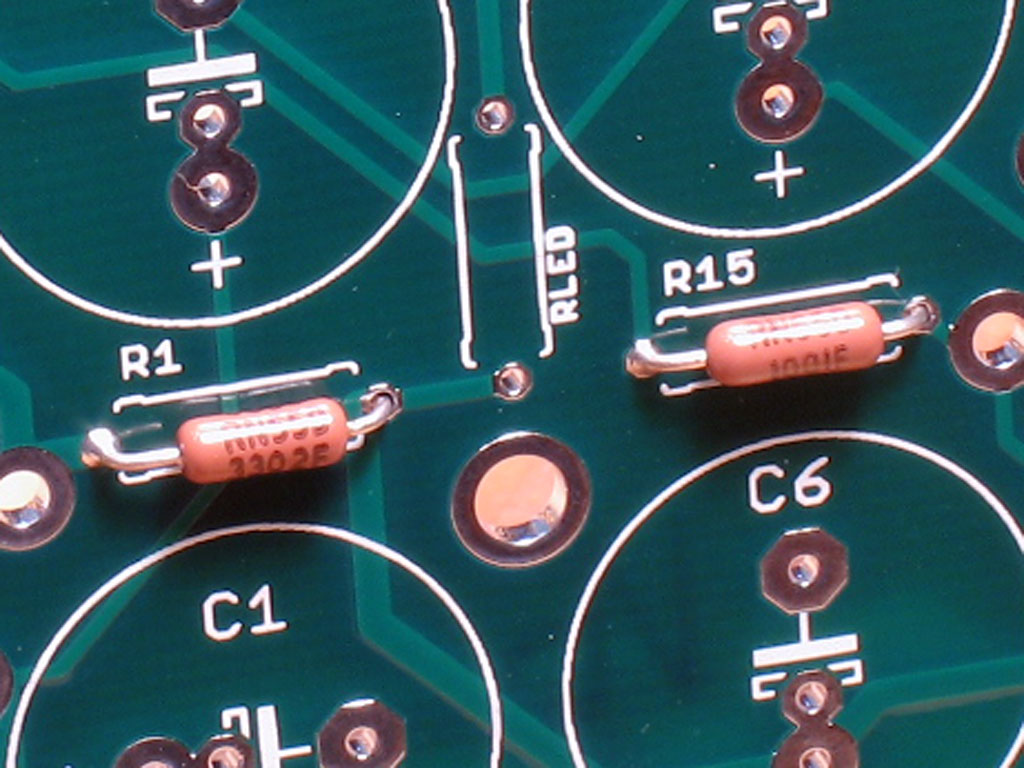
With V-D (Vishay-Dale) resistors - at least the mil-spec kind such as sold by Mouser - there is no resistor color code. Instead, V-D uses an 4-digit scientific notation. The first three digits are a whole number, while the last digit is the base-10 exponent. So, in the pic bat left, we have: 3302 = 330 x 10^2 or 330 x 100 = 33,000 or 33K ohms 2203 = 220 x 10^3 or 220 x 1000 = 220,000 or 220K ohms 5102 = 510 x 10^2 or 510 x 100 = 51,000 or 51K ohms. |
| Keep this in mind while interpreting the resistors. Also - MOST IMPORTANT - bend the leads on the resistors so that the exponential rating is facing up when you install them on the PCB. Without the color code, the exponential notation is the only way to determine value on sight. You can use your DMM to determine the resistance of each resistor, but once installed in the PCB, there are many parallel connections and attempting to measure the resistance of a single resistor is somewhat meaningless. | |
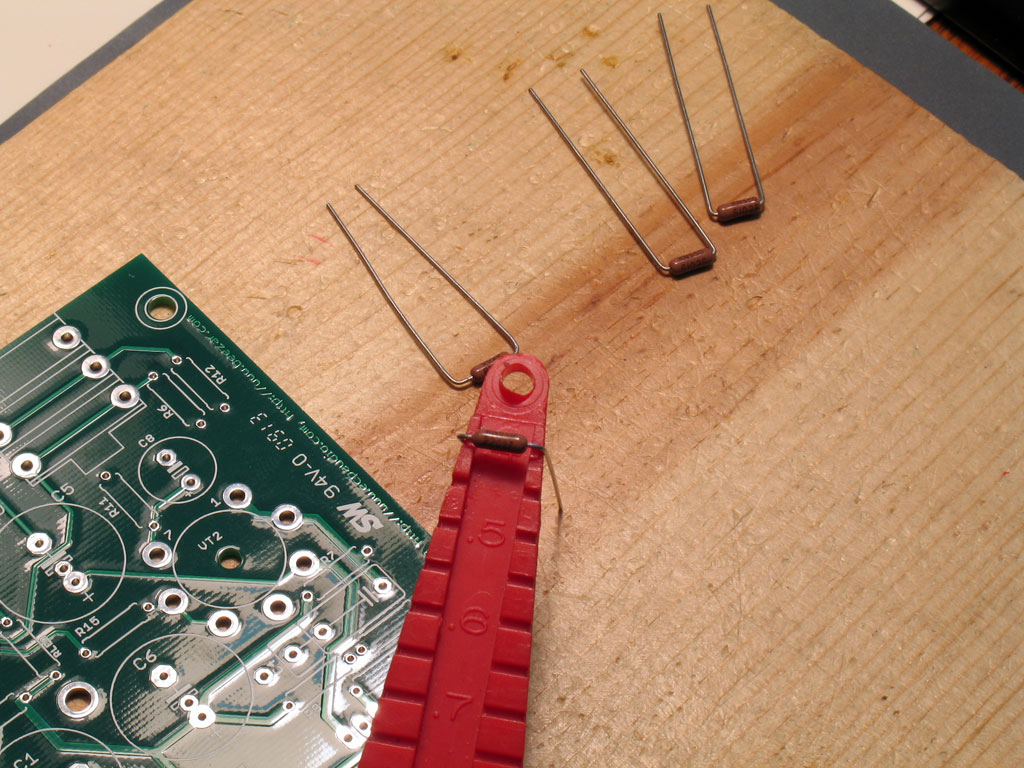 |
3. Bend the Resistor Leads and Place Them On the PCB - Here we see me using the bending jig to bend the resistor leads so that they'll fit the pads on the SSMH. All of them fit correctly on slot 4, but there are two exceptions - R16 and R17 (those two are already bent at top in the photo). These are simply bent at the ends of the resistor body - their pads are much shorter and this will allow a perfect fit. Slot 4 works fine for the rest, however. Again, if you don't have a bending jig, then eye ball them as best you can. |
 |
4. Solder One Lead Only with the PCB - Here we see the PCB with all of the resistors placed into the pads, and the PCB turned over with the leads sticking straight up. The idea is to solder one of the pads for each resistor, while mashing down on the board with your free hand. (Melt the solder with two hands, but while holding the soldering iron to the joint to keep it melted, use the hand that was holding the solder to apply down-pressure to the board.) |
| One hint: while mashing down on the board to apply pressure with a melted solder joint, shift the PCB slightly up or down, left or right, to keep the leads as nearly vertical on the PCB as possible. This keeps the resistors from twisting in their pads, possibly obscuring the exponential rating. |
|
 |
4. Ensure Alignment and Complete Resistor Soldering - Here we see the silkscreen side of the PCB with one pad per resistor soldered. We do this so that we can check the alignment of the parts on the other side. If some are crooked, we can still slightly adjust their position to correct for the effect. |
 |
When you look at the other side, inspect each pad for a "wicking" solder joint. The solder should travel all the way through to the other side and climb up slightly on the lead. If it doesn't, apply a slight bit of solder on the other side around the lead and the pad - just enough to make it look as if the wicking worked |
| In the pic above, note that the right side of the leads are not soldered. That's OK - we have more Acts to perform. Note the wicked-through solder on the joints that are acceptable. If you're happy with the resistors's alignment when you get to this point, then flip the board back over and solder all the leads on the other side. | |
 |
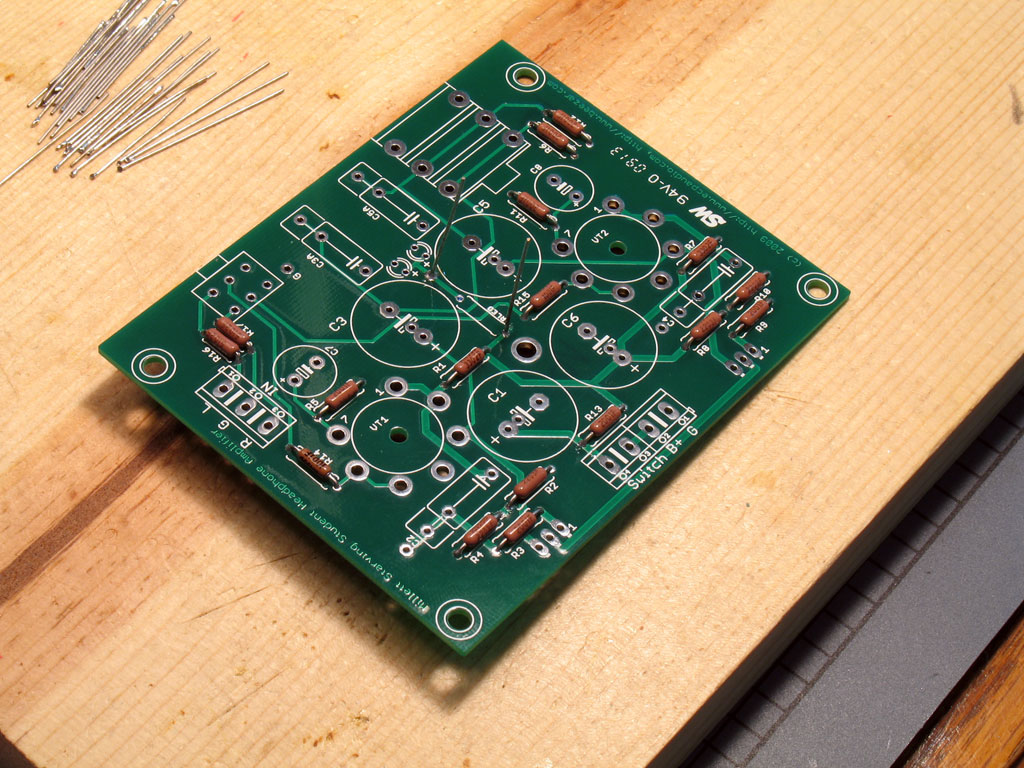
5. Trim All Leads w/Flush Cutter - Here we are with all of the resistor leads trimmed with the flush cutter. |
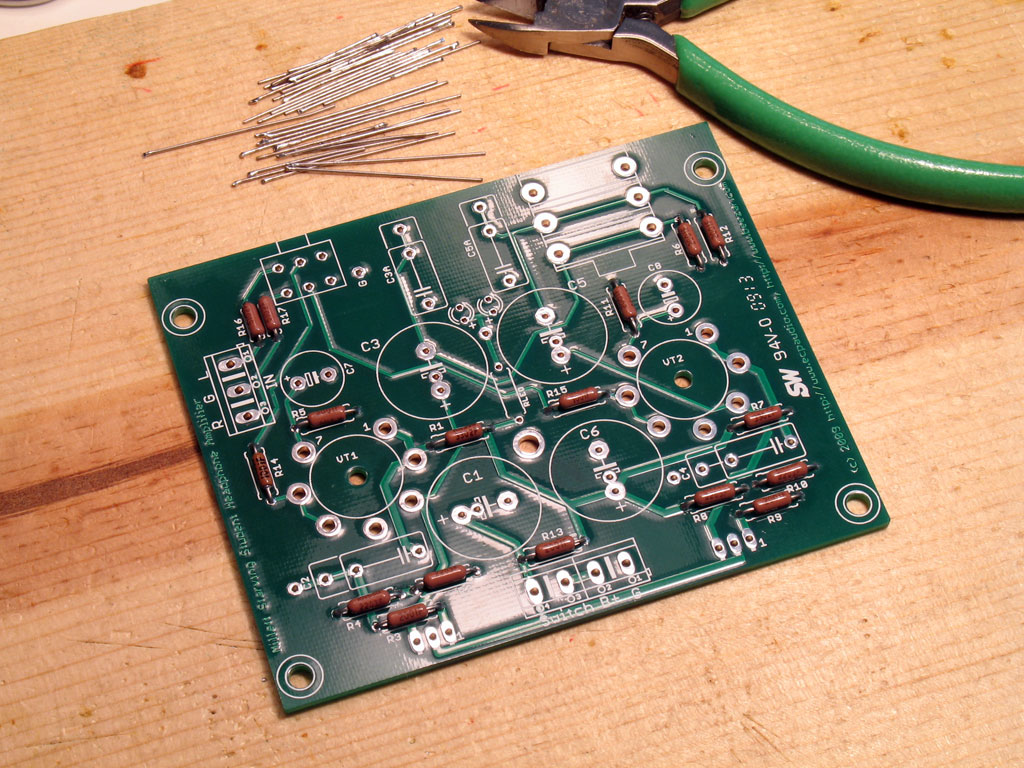 |
Here's the PCB with all of the smaller resistors installed correctly. |
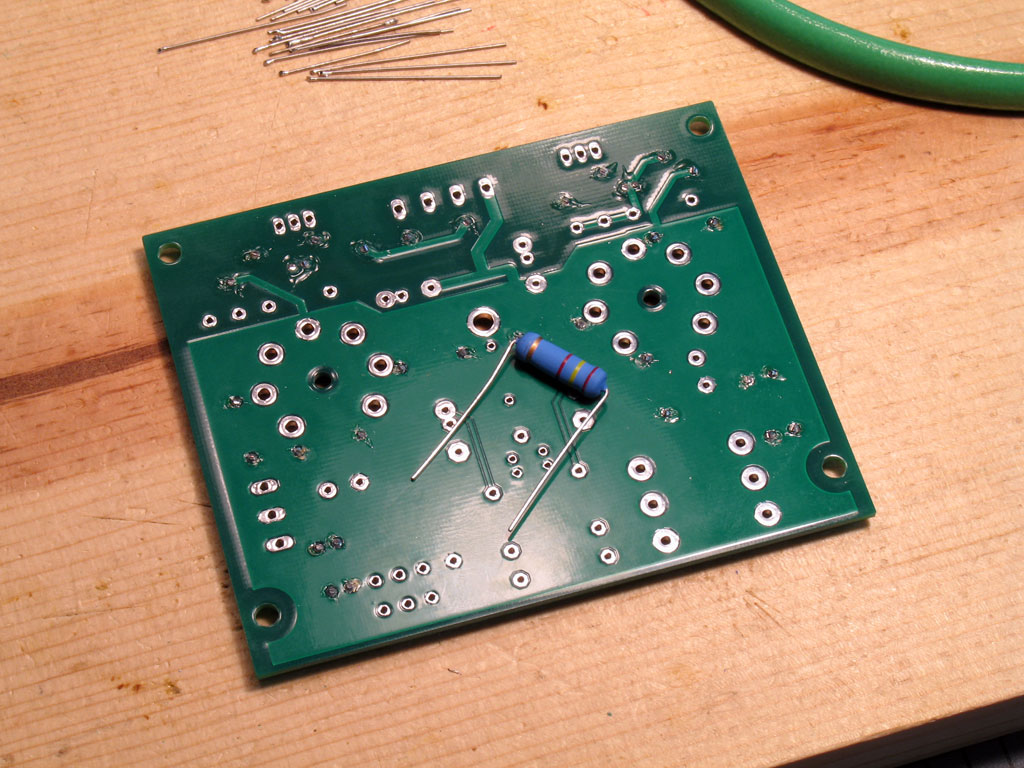 |
6. Next up is the LED resistor - The LED resistor is pretty big. It's sized to handle the two tube LEDs at 10ma a piece and 48VDC. So big, in fact, that it won't fit on the same side as the rest of the parts. This is no problem - it fits fine on the other side. Since it's also much shorter than the tube sockets (they also go on the other side of the PCB), it's best to install it now. |
| Bend the leads sharply on each end as shown. That way, it will fit in the longest distance pads on the PCB. | |
 |
Here we see the resistor placed on the other side with the leads sticking out. Just as with the smaller resistors, press down as you solder one lead, then the other. |
 |
Here it is soldered into place. As before, check to make sure you've got wicking, but be very careful about the center hole. We're going to use a standoff there later and it won't take much to come into contact with the lead on the LED resistor from that center hole. |