|
|
The Mute Audio pupDAC
Construction Preparation
Note: Some pics show the BantamDAC, but the principles are identical!
| Proper preparation in soldering an SMD PCB can't be over-emphasized. Find a good day, a good time of day, and try to relax. This can contribute to steady hands and a clear focus. It can mean the difference between having fun in doing this or creating loads of frustration. At right, you'll see the table I use at home to build projects. There are many methods of organization and this setup makes no particular claim at being ideal. However, it should be able to give you an idea for your own setup. With these ideas you should be able to organize your own workplace and ensure your chances of success in building the pupDAC. |
 |
| |

|
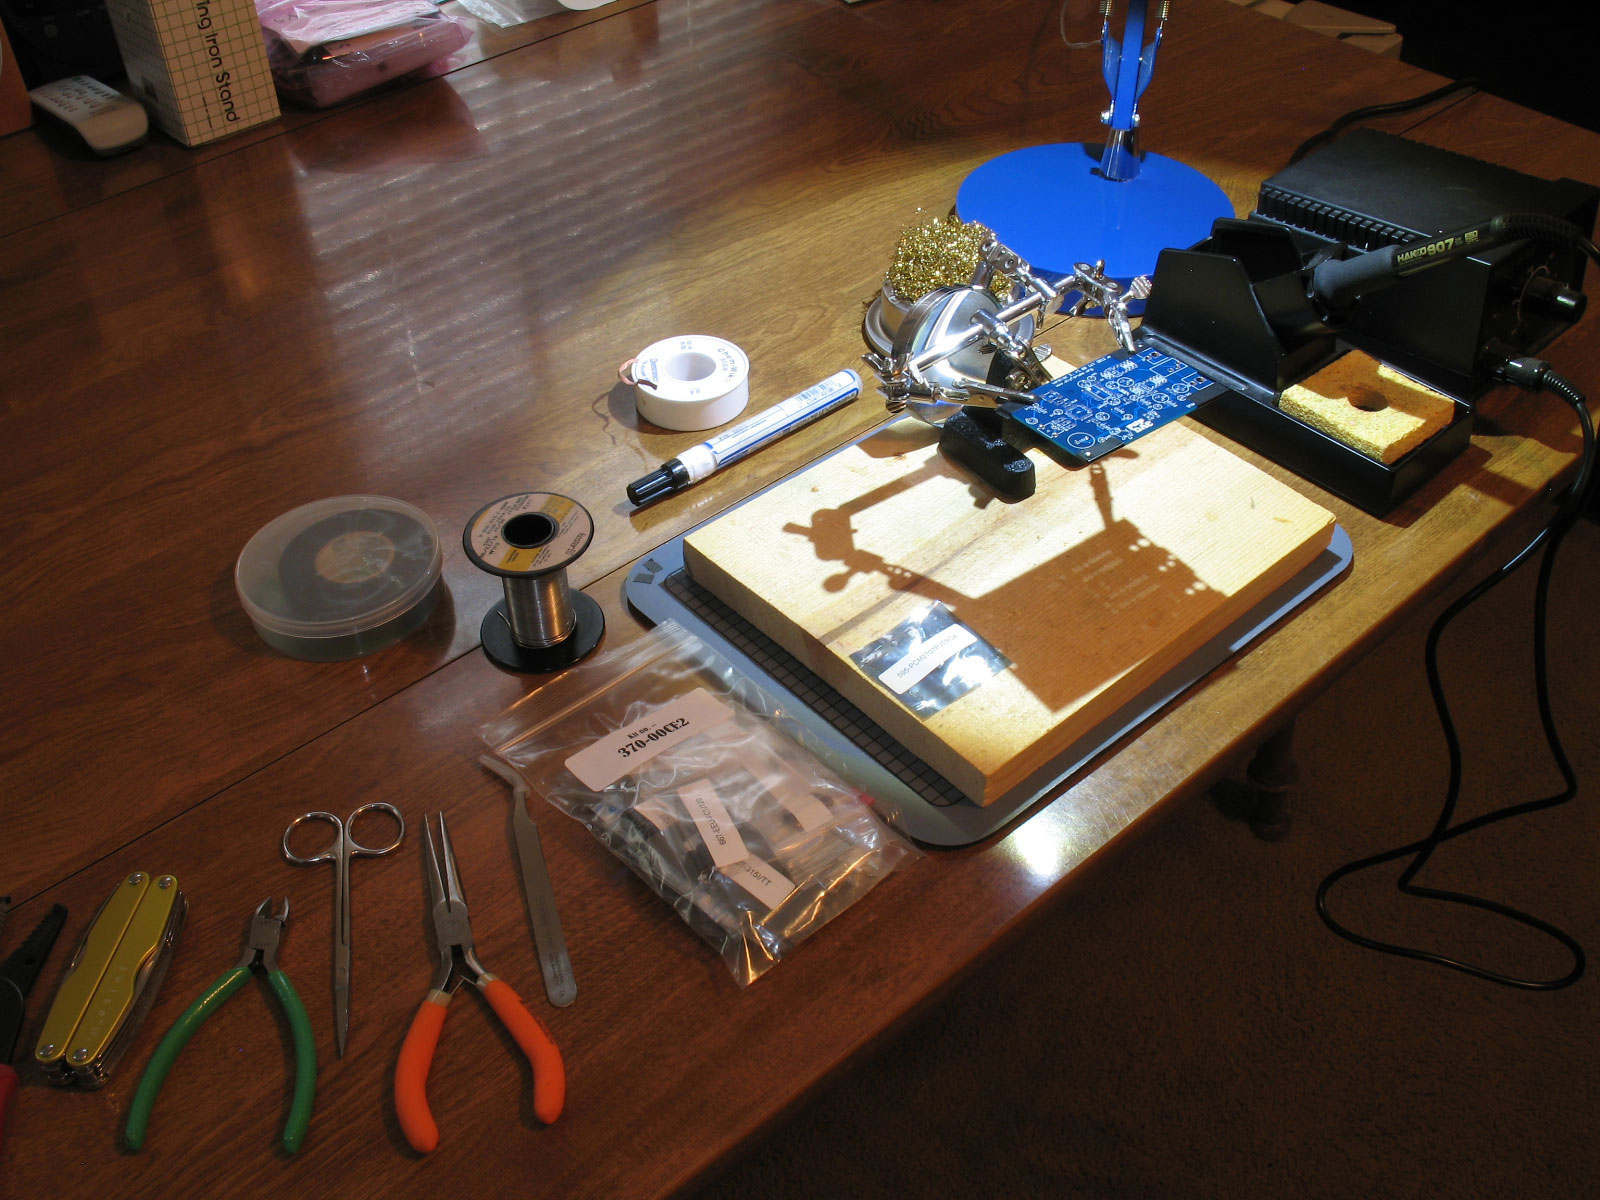
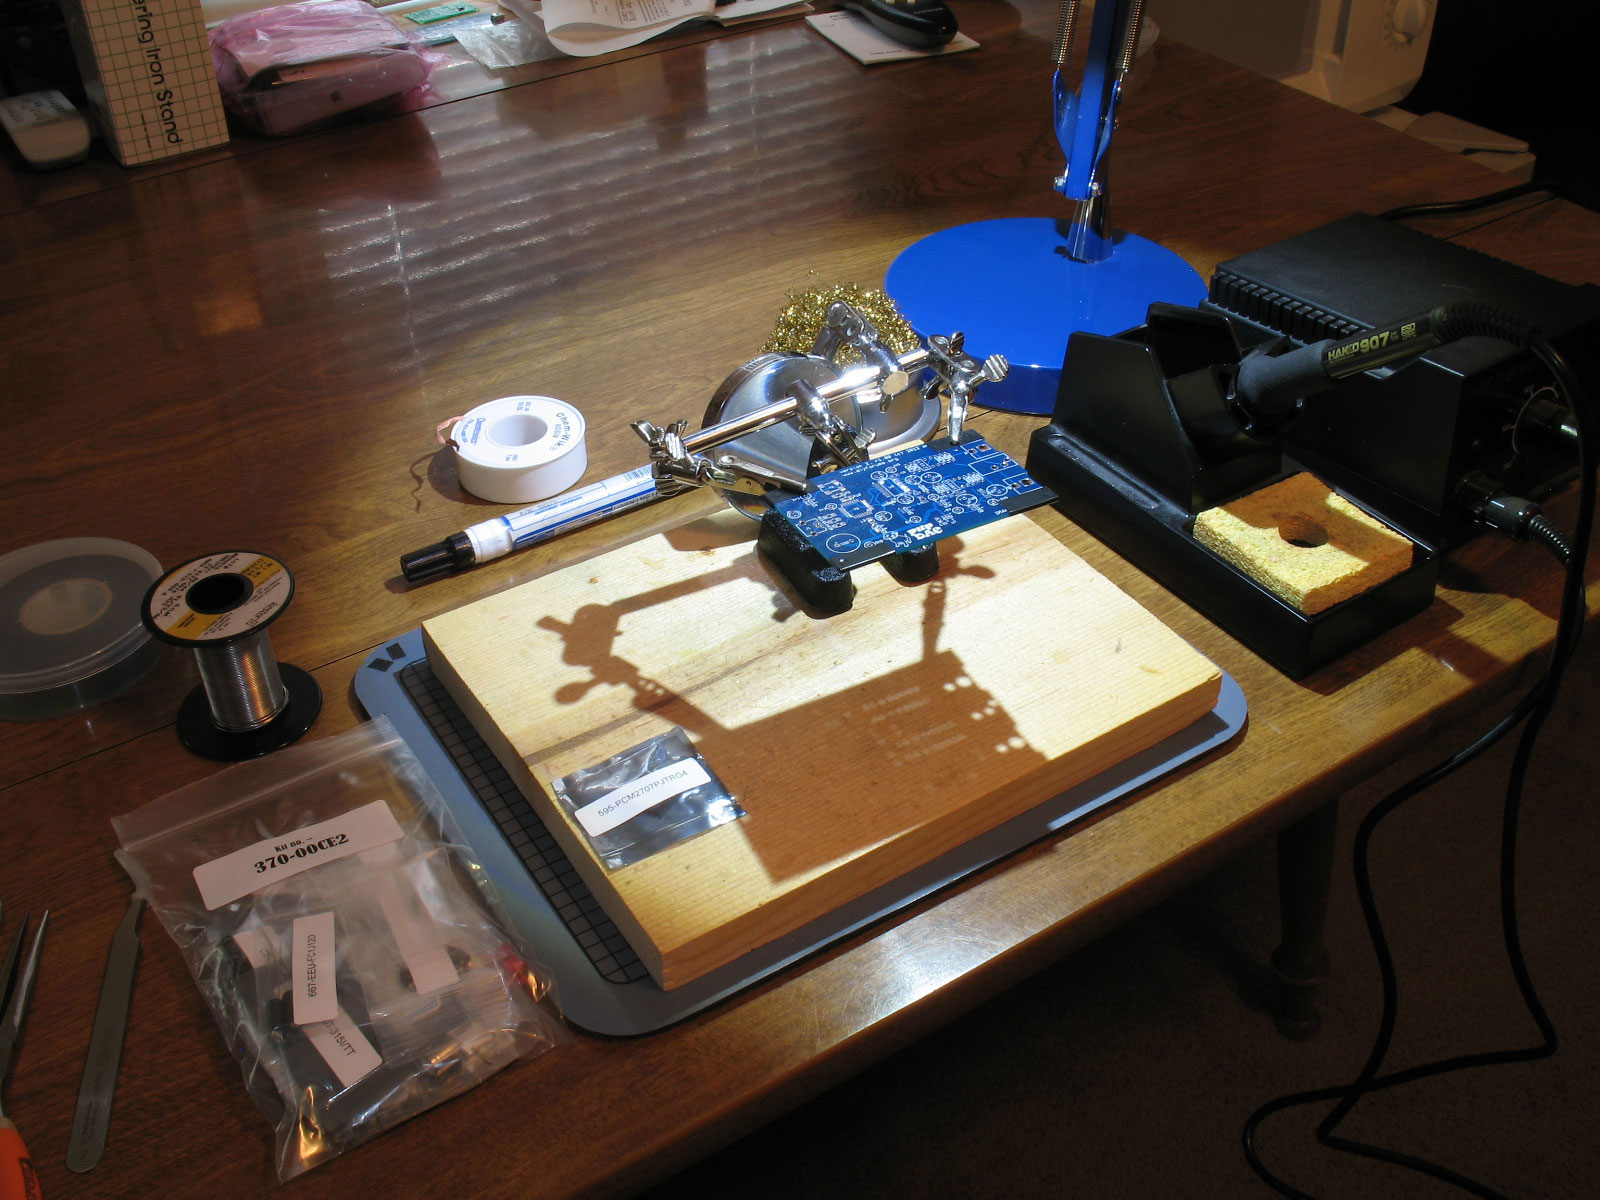
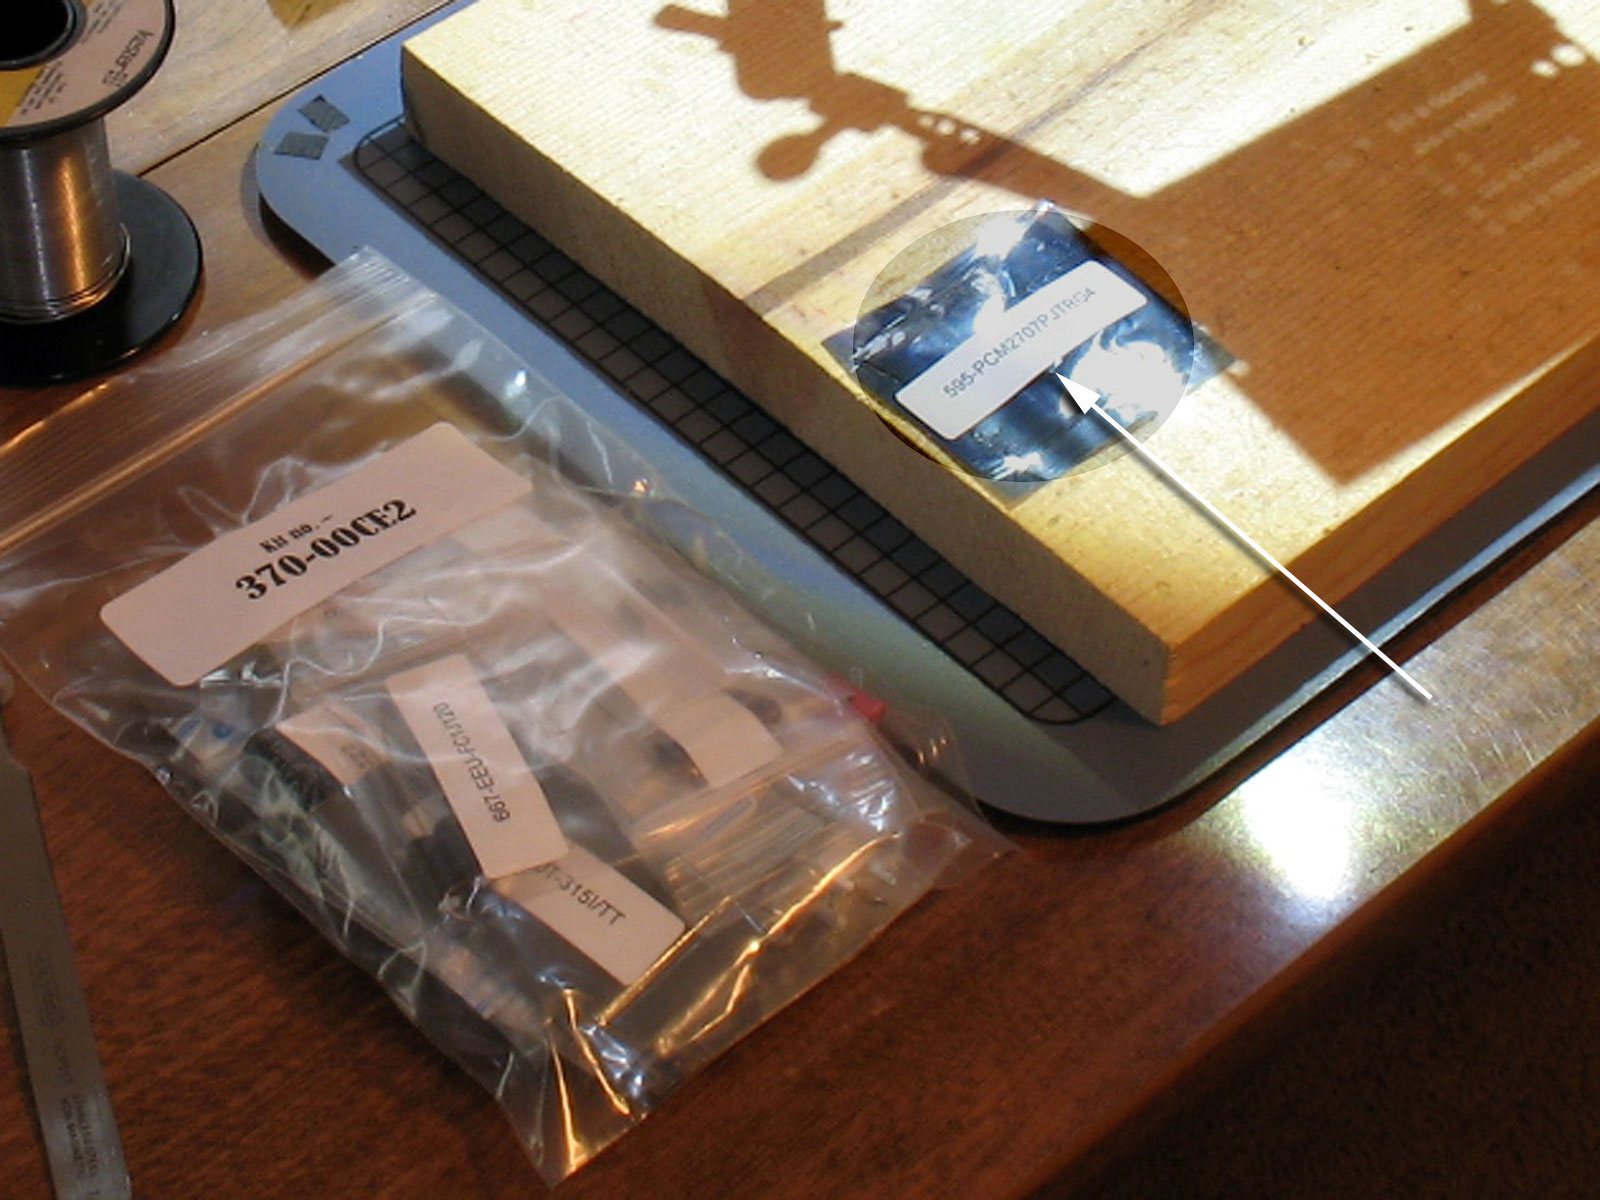
At right:
From left to right at bottom - the pupDAC kit as packaged from Mouser, my building board (1x10 finish-pine) on a non-skid foam mouse pad, the pupDAC PCB held in a set of helping hands ($1.99 Harbor Freight special), on the building board, the Beezar/Mouser-pupDAC kit package for the PCM2707, and finally - my Hakko 936 (6 years old and still going strong).
From left to right at top: electrical tape (used to protect the corners of the PCB from the helping hands' alligator clips), a roll of Kester rosin-core eutectic solder (0.025" dia), de-soldering braid, a flux pen, brass wool for soldering iron cleaning (better than a water sponge), and a high-intensity LED lamp.
|

|
At left:
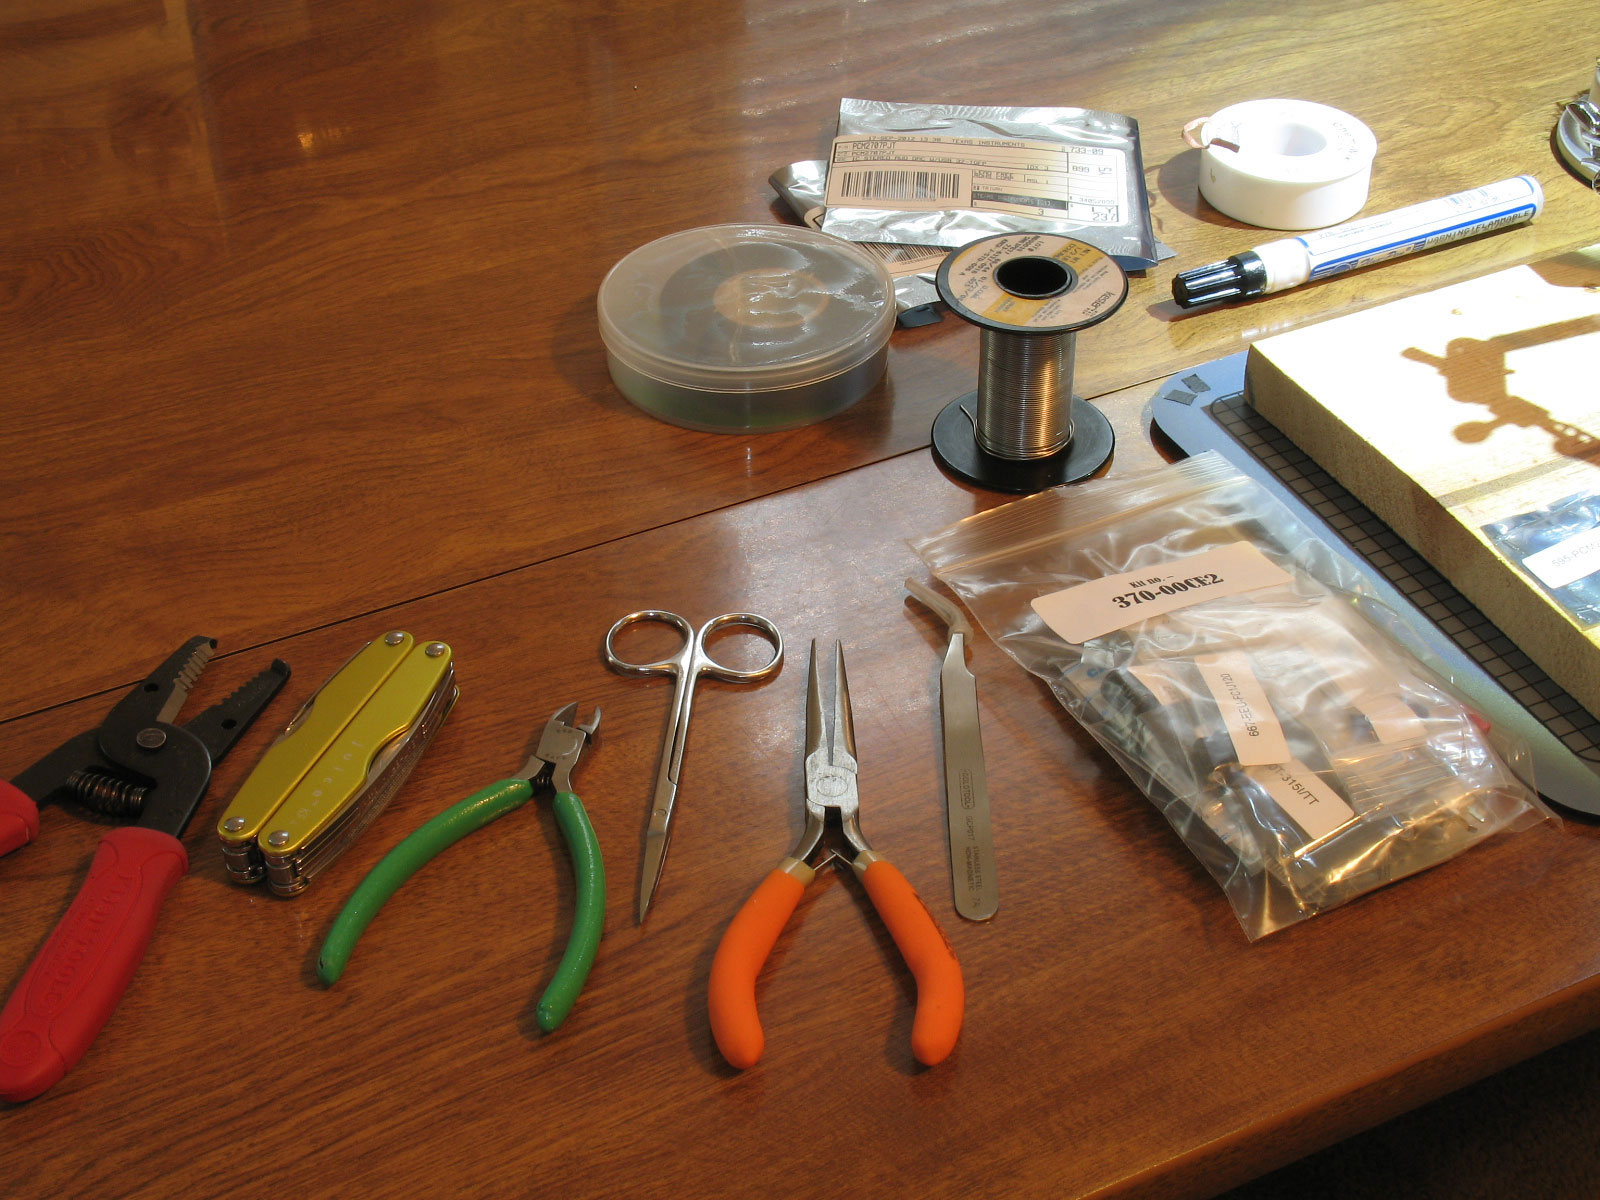
From left to right at bottom - wire strippers (not needed, but just in case), a Leatherman knife (for those odds and ends that come up), quality flush cutters, detail scissors, smooth-jaw pliers, curved-tip detail tweezers (see Overview), and the pupDAC parts kit as it comes mass-produced and packaged from Mouser.
The cutter/strippers were purchased at Lowes, the smooth-jaw needle-nose pliers from Harbor Freight for $1.99, and the scissors came from a first-aid kit. Don't scrimp on the flush cutters. Those pictured are a quality pair that were purchased at Mouser. |
As mentioned in the pupDAC overview, the tweezers are the single most important item in assembling an SMD board. These are ESD-safe and use curved tips.
The electrical tape comes in handy for protecting the edges of the board from the Helping Hands alligator clips. The de-soldering braid helps to clean up mistakes. The flux pen may be the second most important tool for assembling SMD - it allows you to put a very sticky, liquid flux right where it's needed. The flux is so sticky that it can actually help to hold the parts in place while soldering. The solder is a 63-37 eutectic, rosin-core solder that's 0.025" in diameter. That's almost too big, but smaller solder will break easily. The Leatherman knife is optional, of course, but seems to be a most handy tool. It keeps the table uncluttered with knifes, scredrivers, files, etc. that might be used only once - if used at all.
|

|
We hope you use the Mouser-produced kit, but keep in mind that the parts are not labeled according to the BOM and the PCB. They are all individually-labeled, but with Mouser's part number, not the pupDAC's:
Highly recommended.
At left (arrow) is shown the bag for U1 - Mouser has labeled as their part#, which is a combination of the actual manufacturer's part# along with a Mouser prefix. For the PCM chips, this is easy. It's not so easy later on, so be sure to have the pupDAC BOM printed out and handy, so that you can check and verify each part before installing it on the PCB. |

|
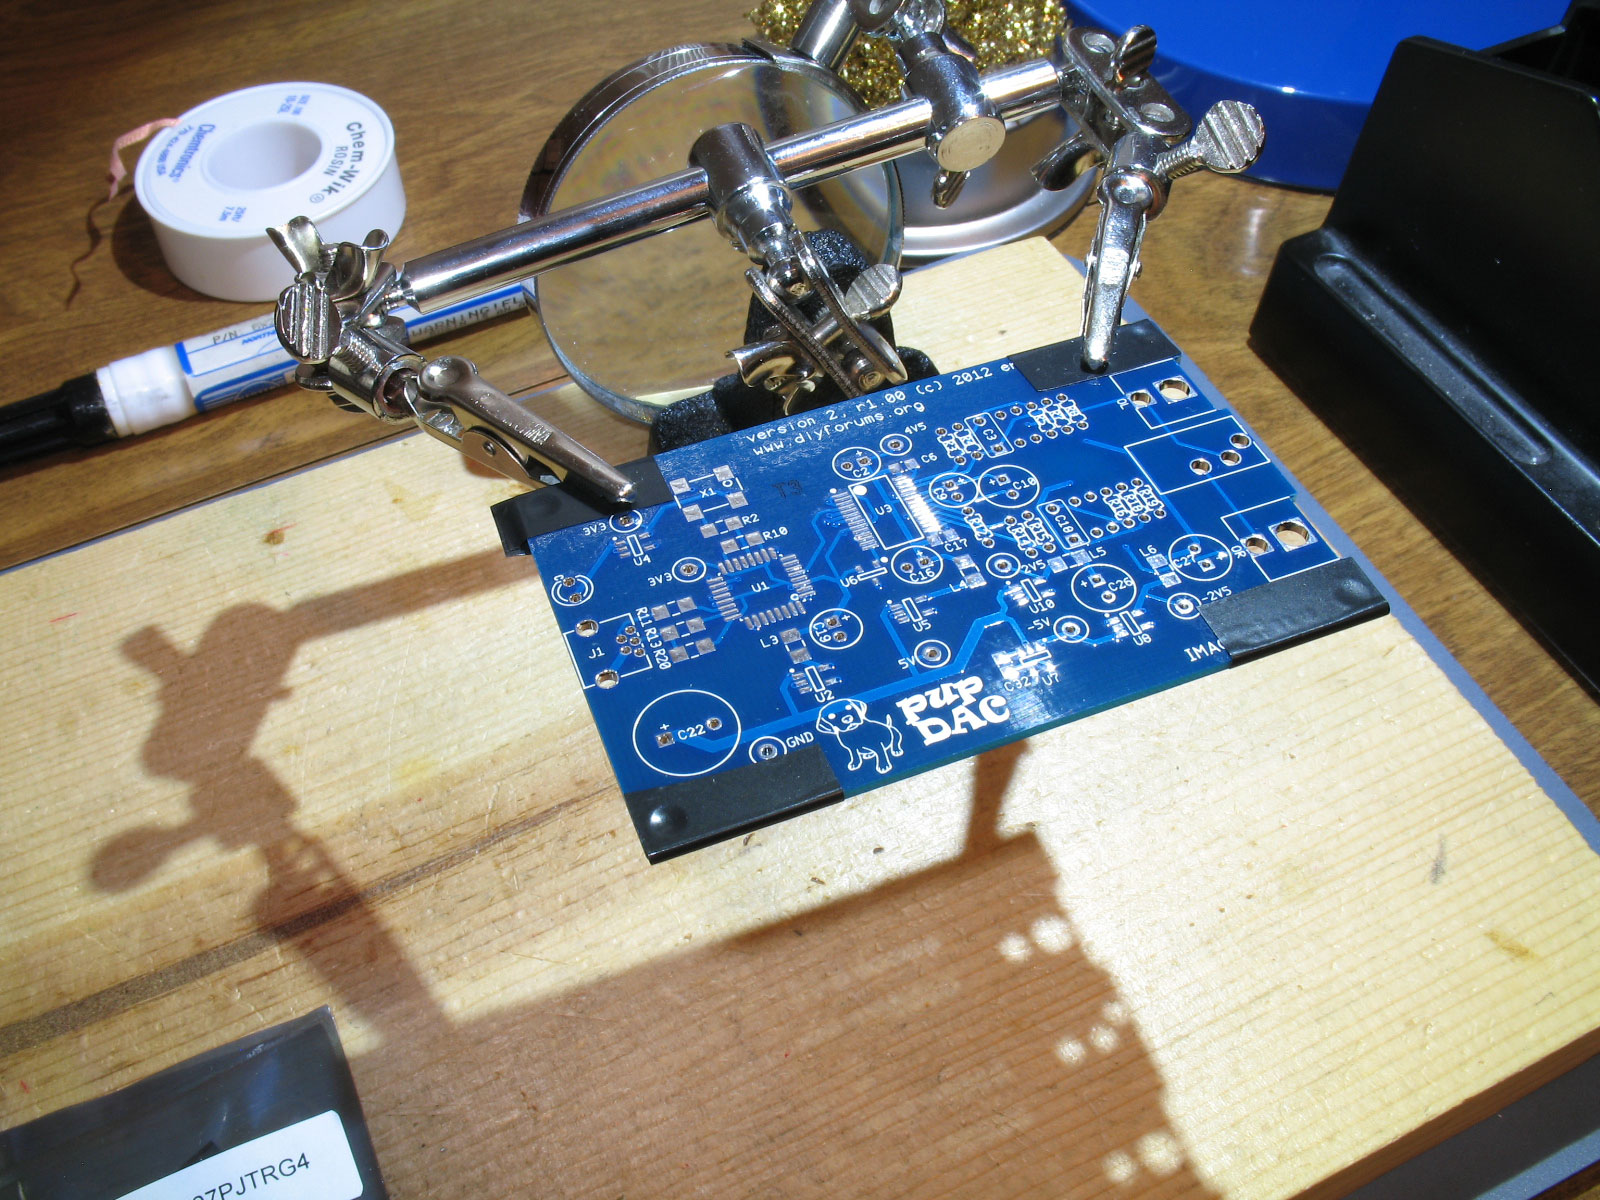
Here is a set of helping hands - as mentioned before, not very expensive: about $1.99 when on sale at Harbor Freight. Note the pieces of electrical tape to protect the edges of the board from scratches from the alligator clips.
These helping hands come with a magnifying glass, which comes in handy for inspecting the pins of the PCM chips. However, in this instance, the odd position of the magnifying glass is actually functioning as an additional support for the pupDAC board. You want to make sure that the helping hands is holding the board so that you can apply a reasonable amount of force without tipping over. |
|
|